Create a Design in under 3 minutes!
If you are in the market for an easy way to create seamless repeats, and would like to spend a short amount of time creating them, you are in the right place! Start designing like a pro with this quick and easy video tutorial! You will need a version of Adobe Illustrator. Simply follow these quick and easy steps:
WeaveUp’s Design Curation Process
The design curation process guarantees a flawless selection of designs for our partners and more sales possibilities for designers. A great design is both beautiful and technically sound. In digital printing, what you see on screen is what will be printed on fabric. Therefore, we are selective when choosing designs to share with our partners. Each published design goes through a curation process, where we examine it for flaws. Appropriate designs may be shared with our commercial partners, while designs with technical issues will not. We reserve the right to keep designs with major flaws unpublished. To help you to optimize your design’s potential, we’ve put together this post to explain some of the things we are looking for when we curate designs. Design Curation Process: what we look for in scale The best trick to scaling a design for WeaveUp is setting it at 150dpi and fit within 54”. Keep in mind that some of our clients are in Home Decor trades, where motifs are preferred to be large-scale. With WeaveUp’s Customization Tool you: Can reduce a design’s original scale. Can not increase a design’s original scale. Here’s what we look for regarding scale. Appropriate scale for the intended use: Designs should not be scaled too small, as our tool is unable to enlarge them more than the original file size. Optimal resolution and quality: Designs should be clean and sharp, and free of pixels and noise created by inappropriately enlarging the image. Design Curation Process: what we look for in repeats. Here’s what we look for in Basic, Half-Brick, or Half-Drop Repeats. Seamless Repeats: Elements in your design match along the repeat line. Spacing: Elements should be spaced well and no visible lines or large clumps between them. Rotation: Elements should be well placed and not duplicated too close together. Background: Pattern in the background, if present, should be seamless as well. Here’s what we look for in Mirrored Repeats. Cropping: Elements should be cropped appropriately, ensuring they aren not cropped at odd points. Shapes: All shapes created when repeated should be deliberate and not oddly met. Background Pattern: Should be repeating appropriately and not breaking when repeated. Design Curation Process: Line Quality The universal rule is that edges and lines, when present, are clean, continuous and free of stray pixels. When evaluating designs for line quality and noise, we consider the type of design and the artist’s intent. Here’s what we look for regarding image and line quality. Cleanliness: The design, including backgrounds, should be clear of any stray pixels or unwanted noise. Clear edges: The design should have clean, free of unwanted pixels and sharp edges. Smooth and straight lines: The design’s lines should be smooth, or show that curves and bumps are deliberate. Free of overly fine lines: When lines are too narrow, they break down in a different scale. Design Curation Process: Color The best trick for your design to be color-customizable is to create it appropriately, with 12 colors maximum and on a
Change Design Repeats with WeaveUp’s Customization Tool
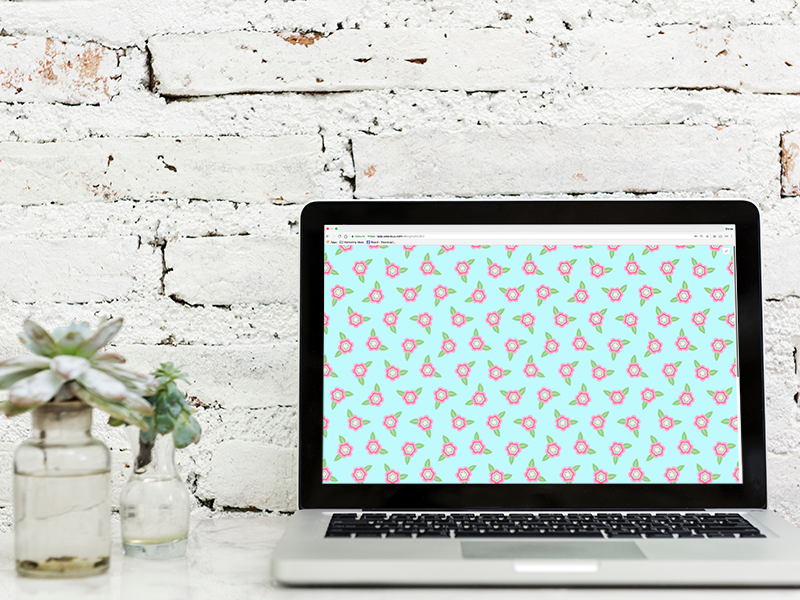
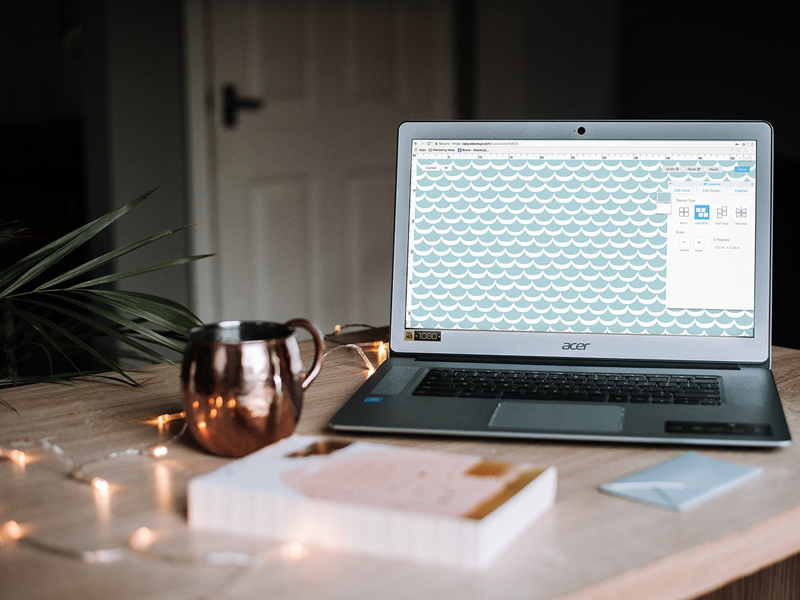
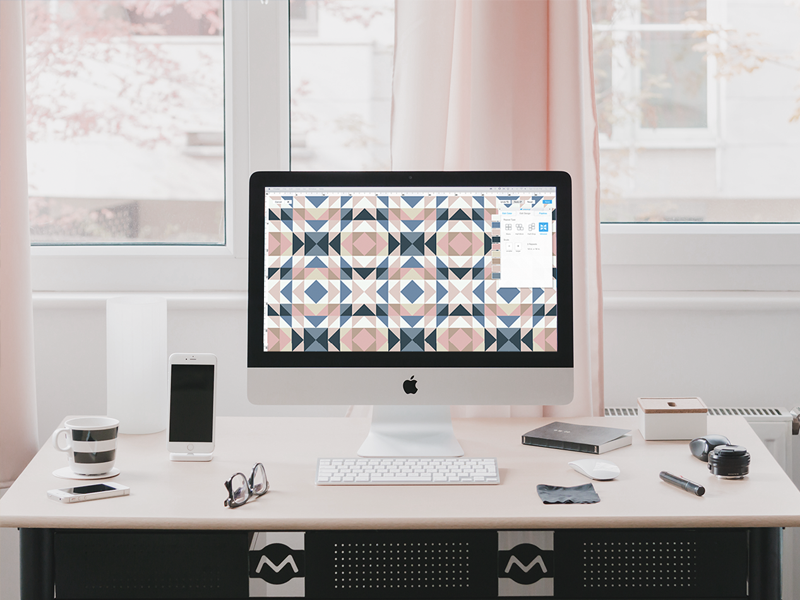
On our previous post, we talked about how to change a design's color. Most designs have an intended repeat, with the WeaveUp Customization Tool you can change design repeats. Let's take a closer look. Change Design Repeats. Let's start by taking a look at the different types of repeats available at WeaveUp: Basic Repeat: Also referred to as a block repeat, this is the simplest repeat style. Your motif is designed as a rectangle that is repeated in a simple grid across the surface. 4-Way Mirror Repeat: This repeat style mirrors your motif both vertically and horizontally. Half-brick Repeat: This repeat style most closely resembles a brick wall. Your motif is repeated in rows, with each row stepping sideways halfway. Half-drop Repeat: Imagine a brick wall rotated 90 degrees: that is a half-drop repeat. Your motif is repeated in columns, with each column stepping down halfway. Change Design Repeats to Basic. The majority of designs in WeaveUp have been created using Basic Repeats, especially when they have seamless repeats. Notice how objects repeat through the area evenly. Geometric design, notice how everything repeats evenly using the Basic Repeat. This simple design repeats evenly throughout. Floral Design, notice how everything repeats seamlessly using the Basic Repeat. Change Design Repeats to 4-Way Mirror. While not all designs will work with this repeat style, it is a good tool to use when a design is not set up with seamless repeat. Change design repeats using this mirror look and get completely different results. Notice how this "waves" design made some ovals/geometrics by simply changing the repeat to mirror repeat. Geometric design, notice how each triangle is facing each other, changing the look from triangles in squares to diamonds. These triangles create a whole new look when set up in mirror repeat. Floral design, notice how some of the flowers overlap with the next, this is because the edge of the image is intended to repeat seamlessly. Change Design Repeats to Half-Brick. Change design repeats using this option, and see how the objects shift 50% to the left. Below are a couple of examples of this repeat: This design is one triangle in the center of a solid color square, therefore it looks evenly when you use the repeat. Geometric design, notice that because the objects are in a perfect square, the design works in this repeat.. Floral design, because this design was created with a seamless, basic repeat, the objects will break up when repeating on this setting, breaking the design. Change Design Repeats to Half-Drop. With this option, you can change design repeats by moving the objects in columns and dropping them 50% down. This is a great repeat to use for designs that have the objects in the center, for example, polka dots, triangles, and certain geometrics. Notice how setting up this repeat for this simple design allows for the objects to repeat in an even manner. Notice how there does not seem to be any change to the way this design repeats
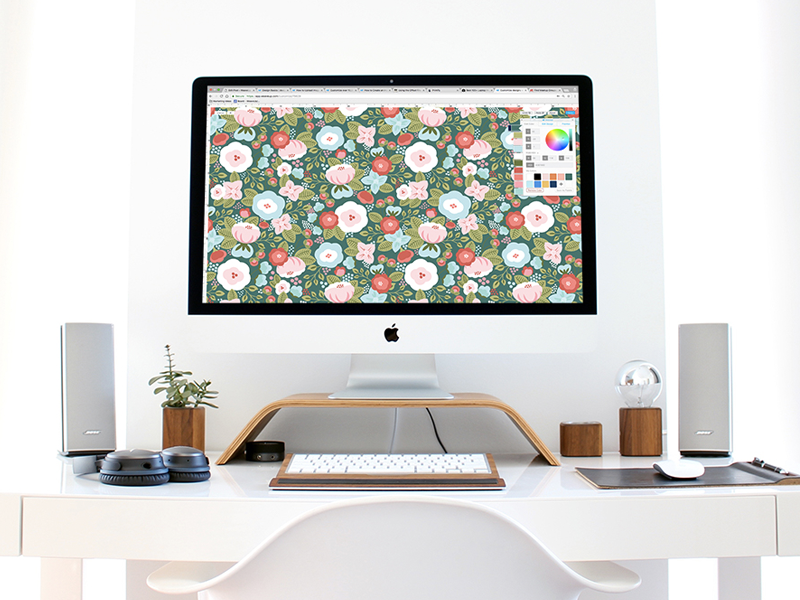
Change Design Colors with WeaveUp’s Customization Tool
You can change design colors with our WeaveUp platform! Assuming that a design has been Optimized {click here to learn more about this}, you can change the color, repeat and scale. We use LAB and RGB/HEX Color Settings, the biggest difference between the two is that you can find more color values on the LAB space than you can on RGB/HEX. There are many ways to change design colors in our platform, let's take a closer look. Change Design Colors. Current Colors. If the design is customizable, you will see all the "color chips" appear on this tool. On each color you will have the option to "Copy" it with the color-drop icon, or "Paste" a color with the drop icon. LAB Values. If you are working with our Huesteria Palette or Mini Guide, you'll notice that we use LAB colors. We explain LAB colors below: L for lightness: 0 to 100, zero represents darkness, therefore one hundred represents lightness. A for green to red: -128 to 127, the lower the number, the greener it gets. If you want more red, then, the number should be higher. B for blue to yellow: -128 to 127, the lower the number, the bluer it gets. If you want more yellow, then, the number should be higher. This is a LAB Color Value Chart Color Picker. If you prefer to move the mouse around, the color picker is right for you! Simply move and slide the small circle around the color wheel to find the color you are looking for. When the selector moves, the numbers around the tool change, therefore changing the design colors to what you select. Lightness Slider. This slider will show you different versions of the color you selected from lighter to darker. RGB Values & HEX Codes. These are very tightly related, they both live in the same color space. As one writer added to their blog post: "HEX color code is shorthand for its RGB values with a little conversion gymnastics in between". We explain RGB colors as follow: R for red: 0 to 255, if the number is closer to 255, then it will have more red. G for green: 0 to 255, if the number is closer to 255, then it will have more green. B is for blue: 0 to 255, if the number is closer to 255, then it will have more blue. My Colors. Create your own palettes! As you work with the designs, you can save colors. Clicking on the "+" sign, you can add up to 12 colors to each palette you create. Saving Your Own Palettes. This tool makes it easier to create collections, make coordinates, and save your favorite colors. Featured Palettes. Select from our Pre-Curated Palette Collections. The image above, shows how a design can be changed in 6 different ways.
Optimize your design’s color to be WeaveUp-ready
Disclosure: While allowing for your designs to be color-editable significantly improves your chances of selling on WeaveUp, it does not mean all designs are good candidates for Color-Customization on WeaveUp. Some designs are so rich and complex that it's best to create various color versions of the same design in Photoshop and upload them individually. This tutorial is for designs intended to have 12 colors or less, but because of the way they were created/saved now have a bit more than that. Here are a few bullet points to consider before diving in: All updated designs go through our curation process, where our design team will inspect and ensure the design is free of technical flaws {such as image quality and repeats} and is color-editable. There are multiple guidelines we follow, and the below are the results: No Technical flaws = your design can be put up for sale. Color editable = we enable this customization on our end, and, next time you see your design, you'll be able to recolor it. Technical flaws = we may reach out to you and collaborate with you on correcting it. Your design will remain unpublished while issues are resolved. In this section, we will teach you how to ensure your design is set up correctly to be color-customizable using Adobe Photoshop and Adobe Illustrator. For this tutorial, we are using the CC versions of these programs, but they are similar enough to other versions and you might still be able to follow these steps depending on your version. Photoshop: Open your raster design in Adobe Photoshop TM. Click: Image > Mode > Indexed {most likely, your image will be in RGB} An Indexed Color window will pop up. If your design contains 256 colors or fewer, "Exact" will be visible. If not, you will want to select "Local perceptual" and choose the number of colors. In this example, we show a design with 256 colors or fewer. Select the following: Palette: Exact > Colors: Will tell you the exact number, in this case, 17 > Forced: none. Note: if you count the intended actual colors on this design, the total is 12, however, since it's an RGB file created in Photoshop, the objects have "soft edges", so there are more colors. Here's a closeup: Select the following: Local (perceptual) > Colors: any appropriate amount under 12 > Forced: None > Transparency: Un-checked > OKNote: it's good to double check yourself, and zoom into your image after doing this, to ensure that your edges look clean. Removing the rest of those diffused colors will help allow your image to be color-editable in our platform. You will likely need to do some clean-ups with your pencil tool {not a Photoshop Brush!} at this point as you will likely have stray pixels floating around. Below is what the edges should change to, notice there are no stray pixels and the colors are solid and clean: Save your image as a TIFF file and now it's ready
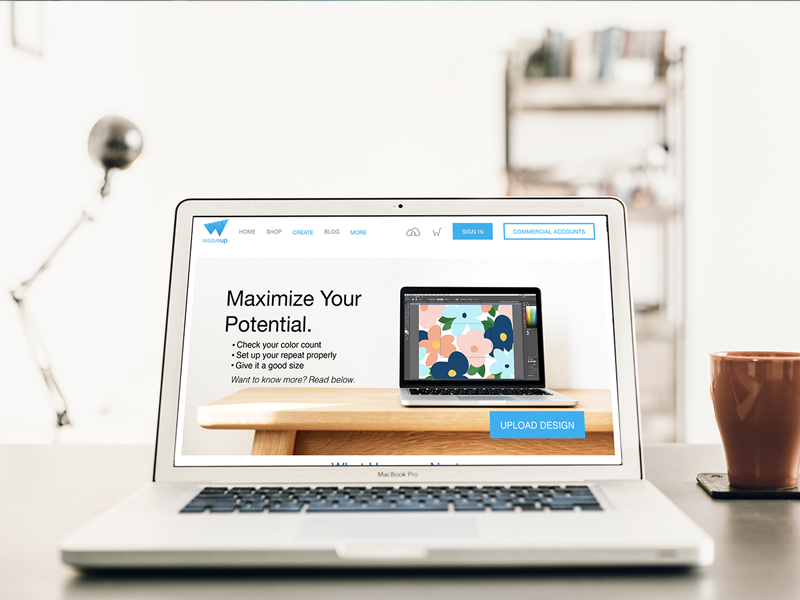
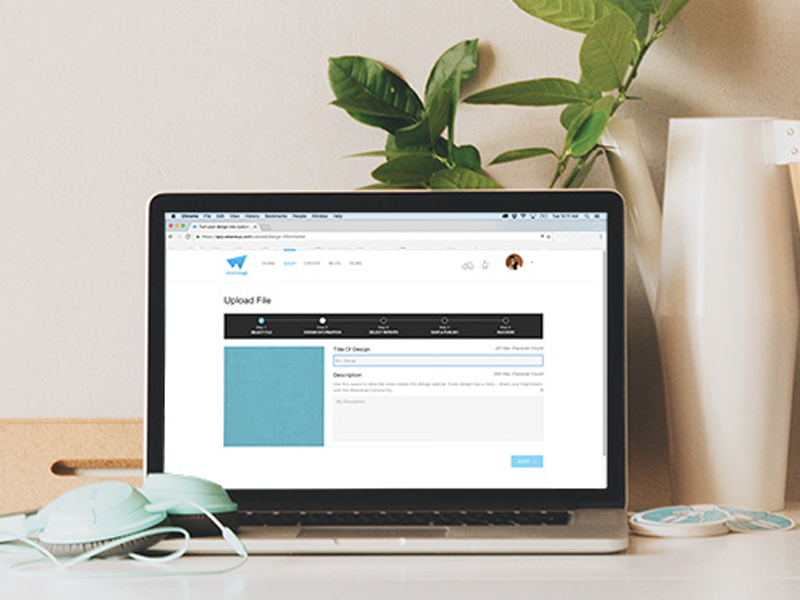
How to Upload Images on WeaveUp
Assuming you already created a gorgeous design, and, followed our art recommendation, you are now ready to upload an image onto our platform! If you haven't read these instructions, it might be best to do so, as you can ensure your design is optimized to be uploaded and customized within our platform. The process is very simple, and easy to follow: When you visit WeaveUp, click on "Create" located on our top navigation: Click on the button that reads: "UPLOAD DESIGN". { Side note: If you continue scrolling on this page, you will find other useful information that will help you upload more optimized designs }. Step 1: Upload your Design. You will be taken to the "Upload your designs" page, make sure you read through the Upload Tips, which contain very useful information about how your files should be set up. You can also find more rich information on how to set up your files on this link. Read and agree to the terms, and click "UPLOAD". Step 2: Design Information. Add a descriptive Title and rich Description, having relevant, rich information to this section, using accurate keywords within it will help your design be found by the world. Please refrain from adding colors to the information, especially if your design will be color-editable. Step 3: Select Repeats. Set up your repeats, play around with the repeat styles, most designs will be "basic" repeats, but some might also work well with the other repeats. Step 4: Save or Publish. Select between "SAVE" or "PUBLISH", don't worry, if you're not ready to make your design public, you can go back and do it later: PUBLISH: When you select this option, your design will go into our Curation Process where our Design Team will inspect it and ensure that is has no technical issues, and, if possible, allow it to be color-editable. This process can take a few days. Once your design is curated, it is then shared with the world. SAVE: will save the design within your library. but you will be the only person who will be able to view it. It will not be for sale or enter our Curation Process.
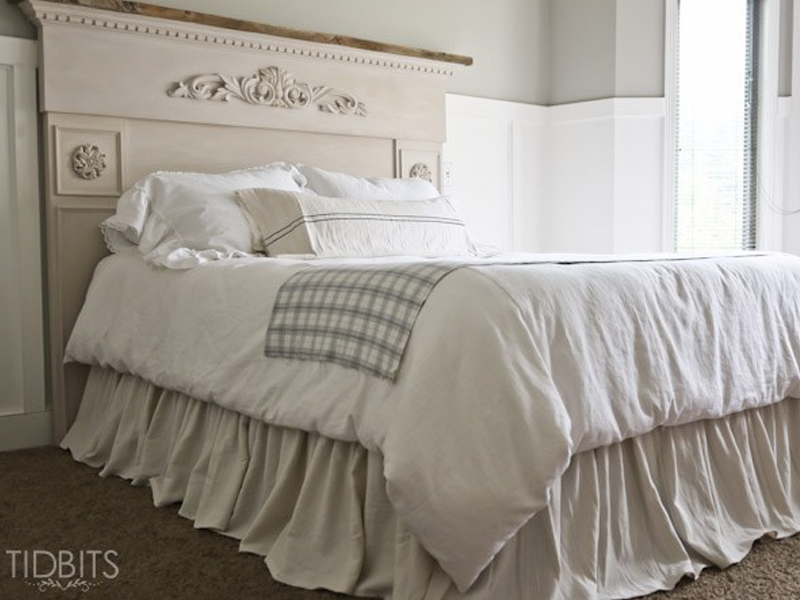
Our Guide to Bedding Fabrics
For some, the term “bedding” simply encompasses those basic necessities to get you through the night: a sheet set, a couple pillowcases, and a comforter or blanket of some sort. However, if you enjoy spending more than just your sleeping hours in this cozy haven, it’s worth it to take your bed to the next level. Today on the blog, we’re exploring the accents that can elevate the style and function of your bedware. Read on to learn all about our fabric recommendations for these transformative DIY projects!
Using Public Domain Art to Create Patterns
Today on the blog, we’re exploring how you can use public domain artwork within your own pattern designs. For many of us, the thorny territory surrounding copyright can be a little confusing and downright intimidating. However, once you understand the basics, you’ll appreciate that the public domain is brimming with potential inspiration and design resources. Read on!
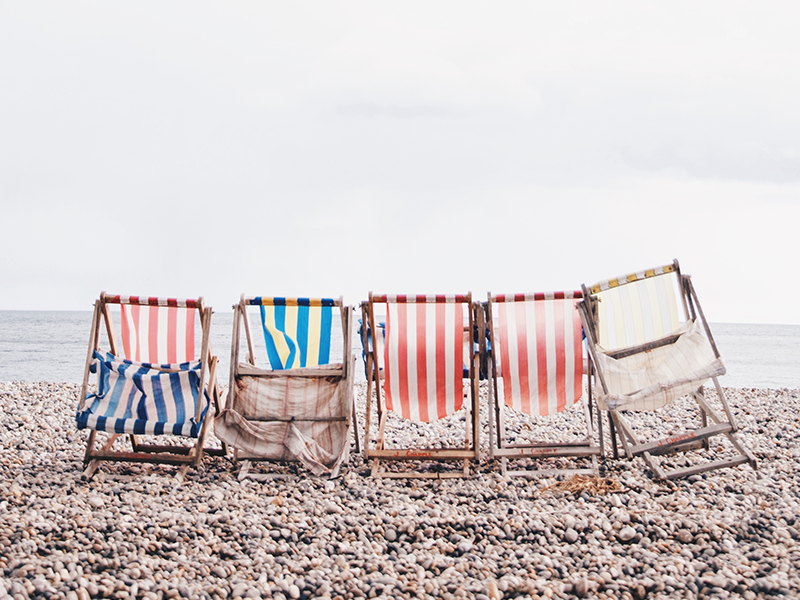
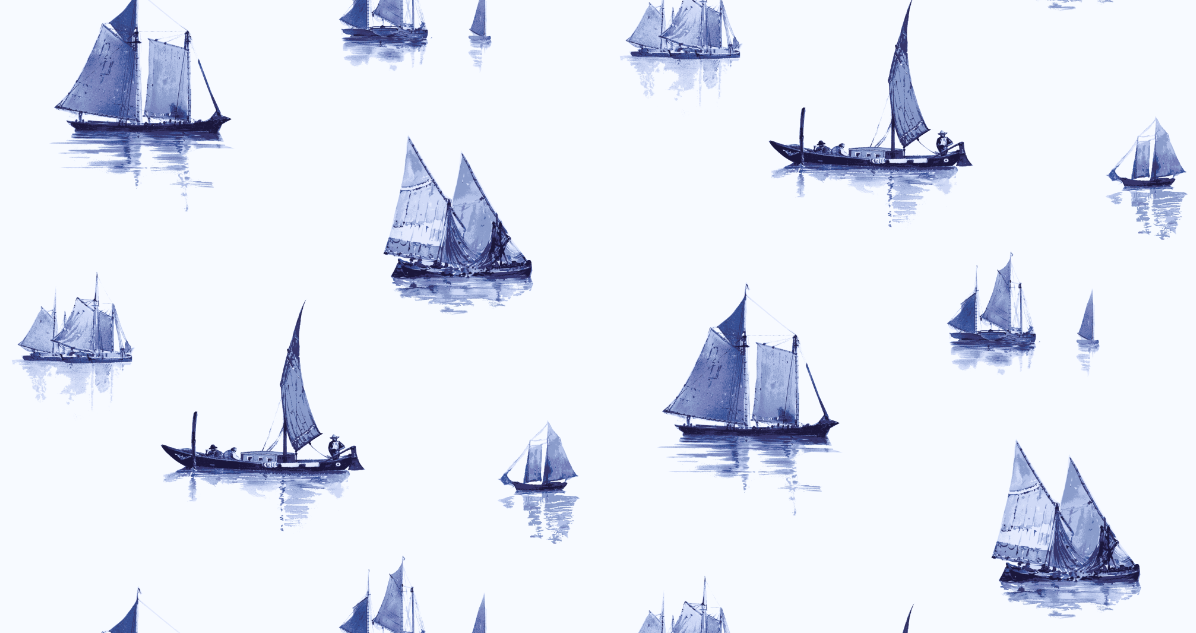
Textile Design Guide: Stripes
Spring is in full bloom and here at the WeaveUp office we’ve got sun, sand, and sea on our mind.When creating our latest seasonal collection (inspired by said sun, sand, and sea), we began to ponder - how did the stripe pattern first came to be associated with nautical endeavors? Today, our Textile Design Guide picks back up with an investigation into the surprising backstory behind the simple stripe! Read on!
Make Your Art Work for You
Our unique Customization Tool allows customers to change the color, scale, and repeat of designs. This means one design can turn into hundreds of color, repeat, and scale variations - exponentially increasing your chance of a sale. Check out our tips for optimizing your art files for color, scale, and repeat customization.